Renewing a US tourist visa in Singapore as a foreigner

Holding a Philippines passport means you will plan most international travel well in advance. This is especially true for trips to the United States. (Photo by Erica Jahn on Unsplash)
I hold a weak passport in a country whose citizens hold the world’s strongest passport.
Whenever I need to get a visa, there are very few resources online for how to actually get it done. I’ve even gone on adventures to Kuala Lumpur for smaller countries that didn’t have consular services in Singapore.
In my case, I was renewing my B-1/B-2 (Tourism/Business) United States Visa that expired in 2022, and was originally issued by the US embassy in Manila. I’m writing it down, hopefully to benefit someone is in a similar situation.
Step 1: Fill out and submit the DS-160 form
The first step is to complete the DS-160 form on the US State Department website. It’s a straightforward enough form that asks about your family, employment, travel history, and several questions to make sure you aren’t immediately disqualified from obtaining a visa.
Gather your travel and employment history
Apart from the usual information, it’s best to prepare the following information:
- Exact dates of any previous visits to the United States
- All the countries to which you have traveled in the past 5 years.
- Employment history for the last 5 years
For travel history, I used my photos app to determine the rough dates, then referred to a scanned copy of my previous passports to determine the exact arrival and departure times from the stamps. For employment history, I used my LinkedIn profile.
Take an appropriate photo
It’s best to go to a photo studio and get both digital and physical copies made. Although they allow you to upload one you’ve taken yourself, later on, you’ll need to submit a physical picture anyway.
Take note that eyeglasses aren’t allowed in the photo, and you should have a neutral expression. See the full guidelines.
Fill out and submit the form online
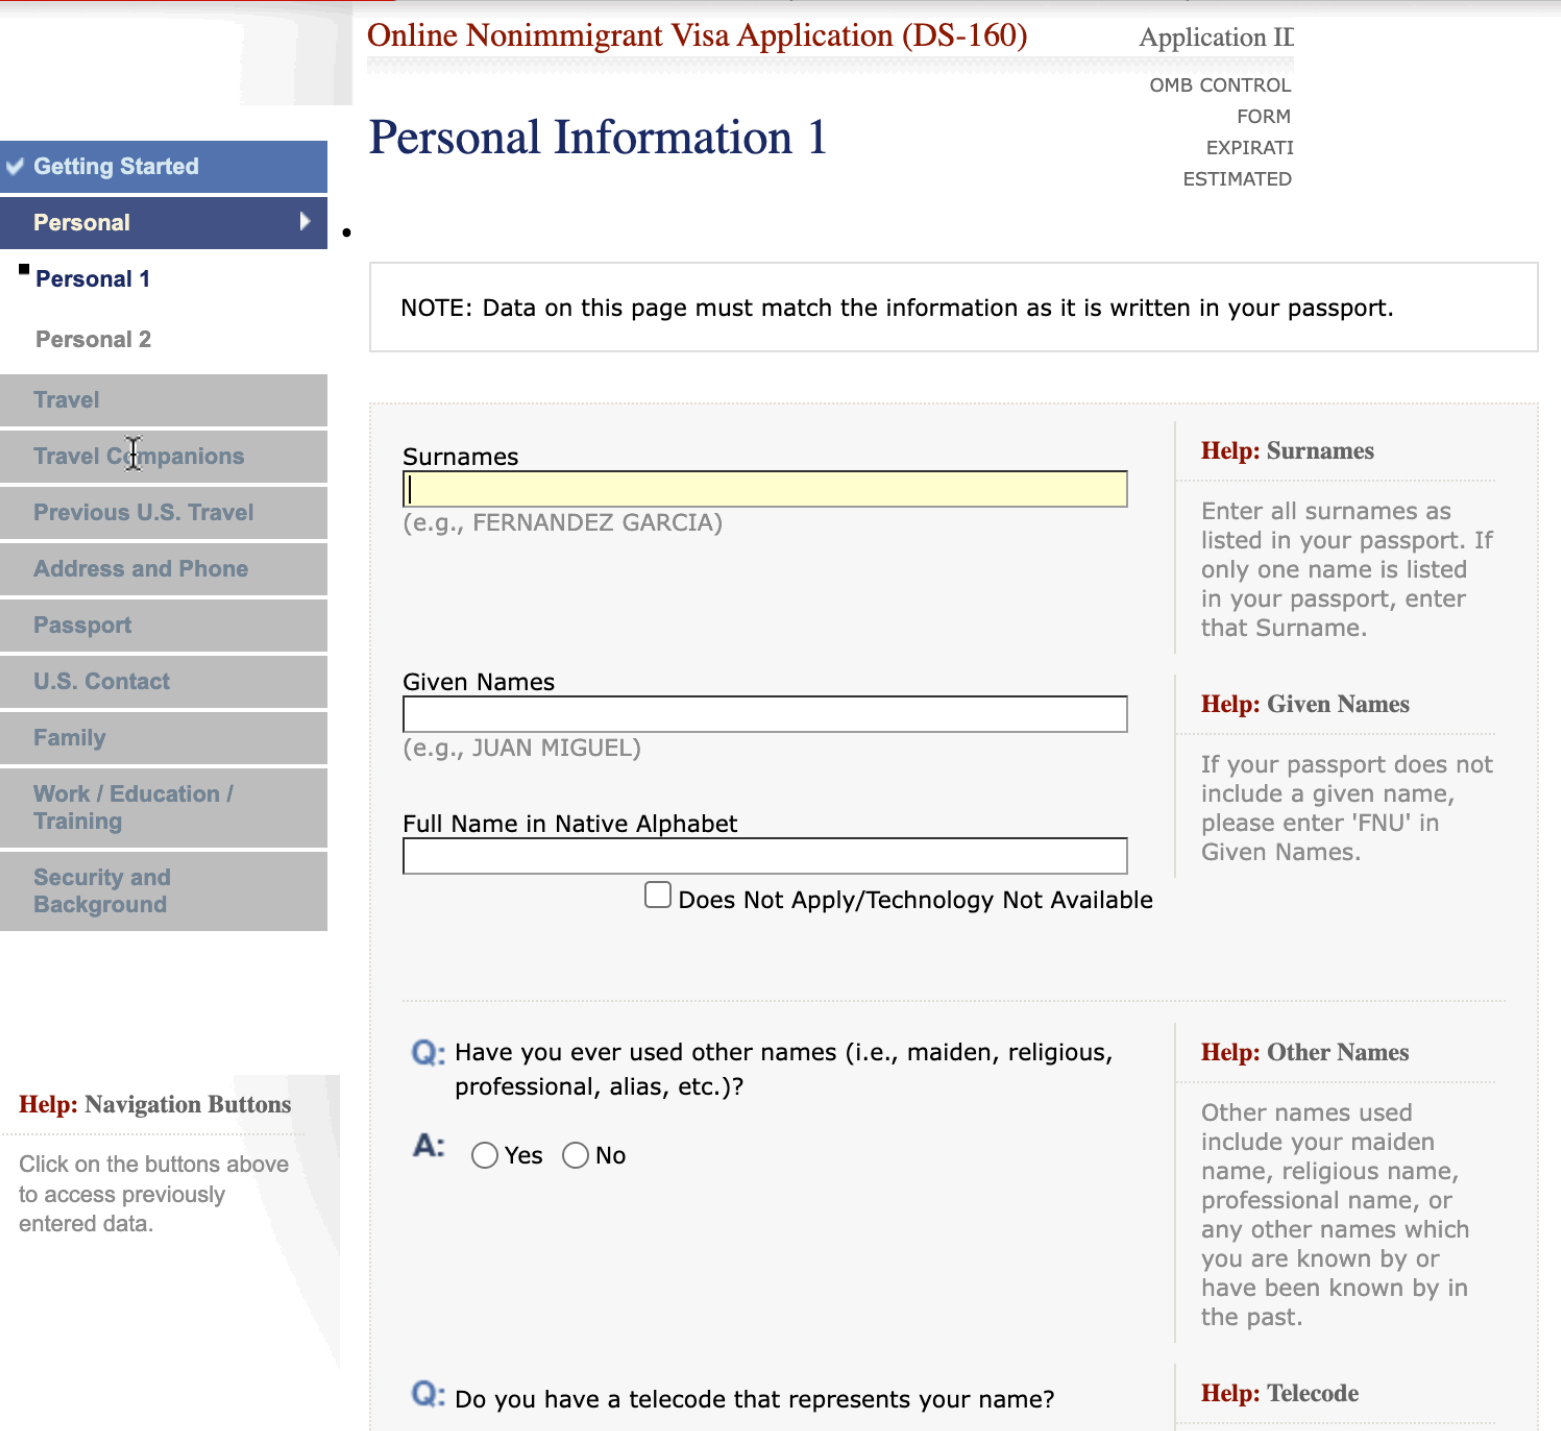
Once you have the photo and the travel history, go ahead and fill out the form.
The DS-160 form is a bit finicky and would commonly boot me out at random intervals. I noticed that it’s best to use a desktop browser like Chrome, Firefox, or Edge to complete the process rather than a phone or tablet.
You can save your progress, so just go through the form first and save progress when you are asked for information you do not have.

This confirmation page can be printed out directly or sent to your email to be printed out. The email and direct printouts are slightly different.
Once you’ve completed the form, you can print out a confirmation page with a barcode. Make sure to send it to your email as well so you can get it back if you lose your printout or don’t have a printer nearby.
Step 2: Pay the visa application fee
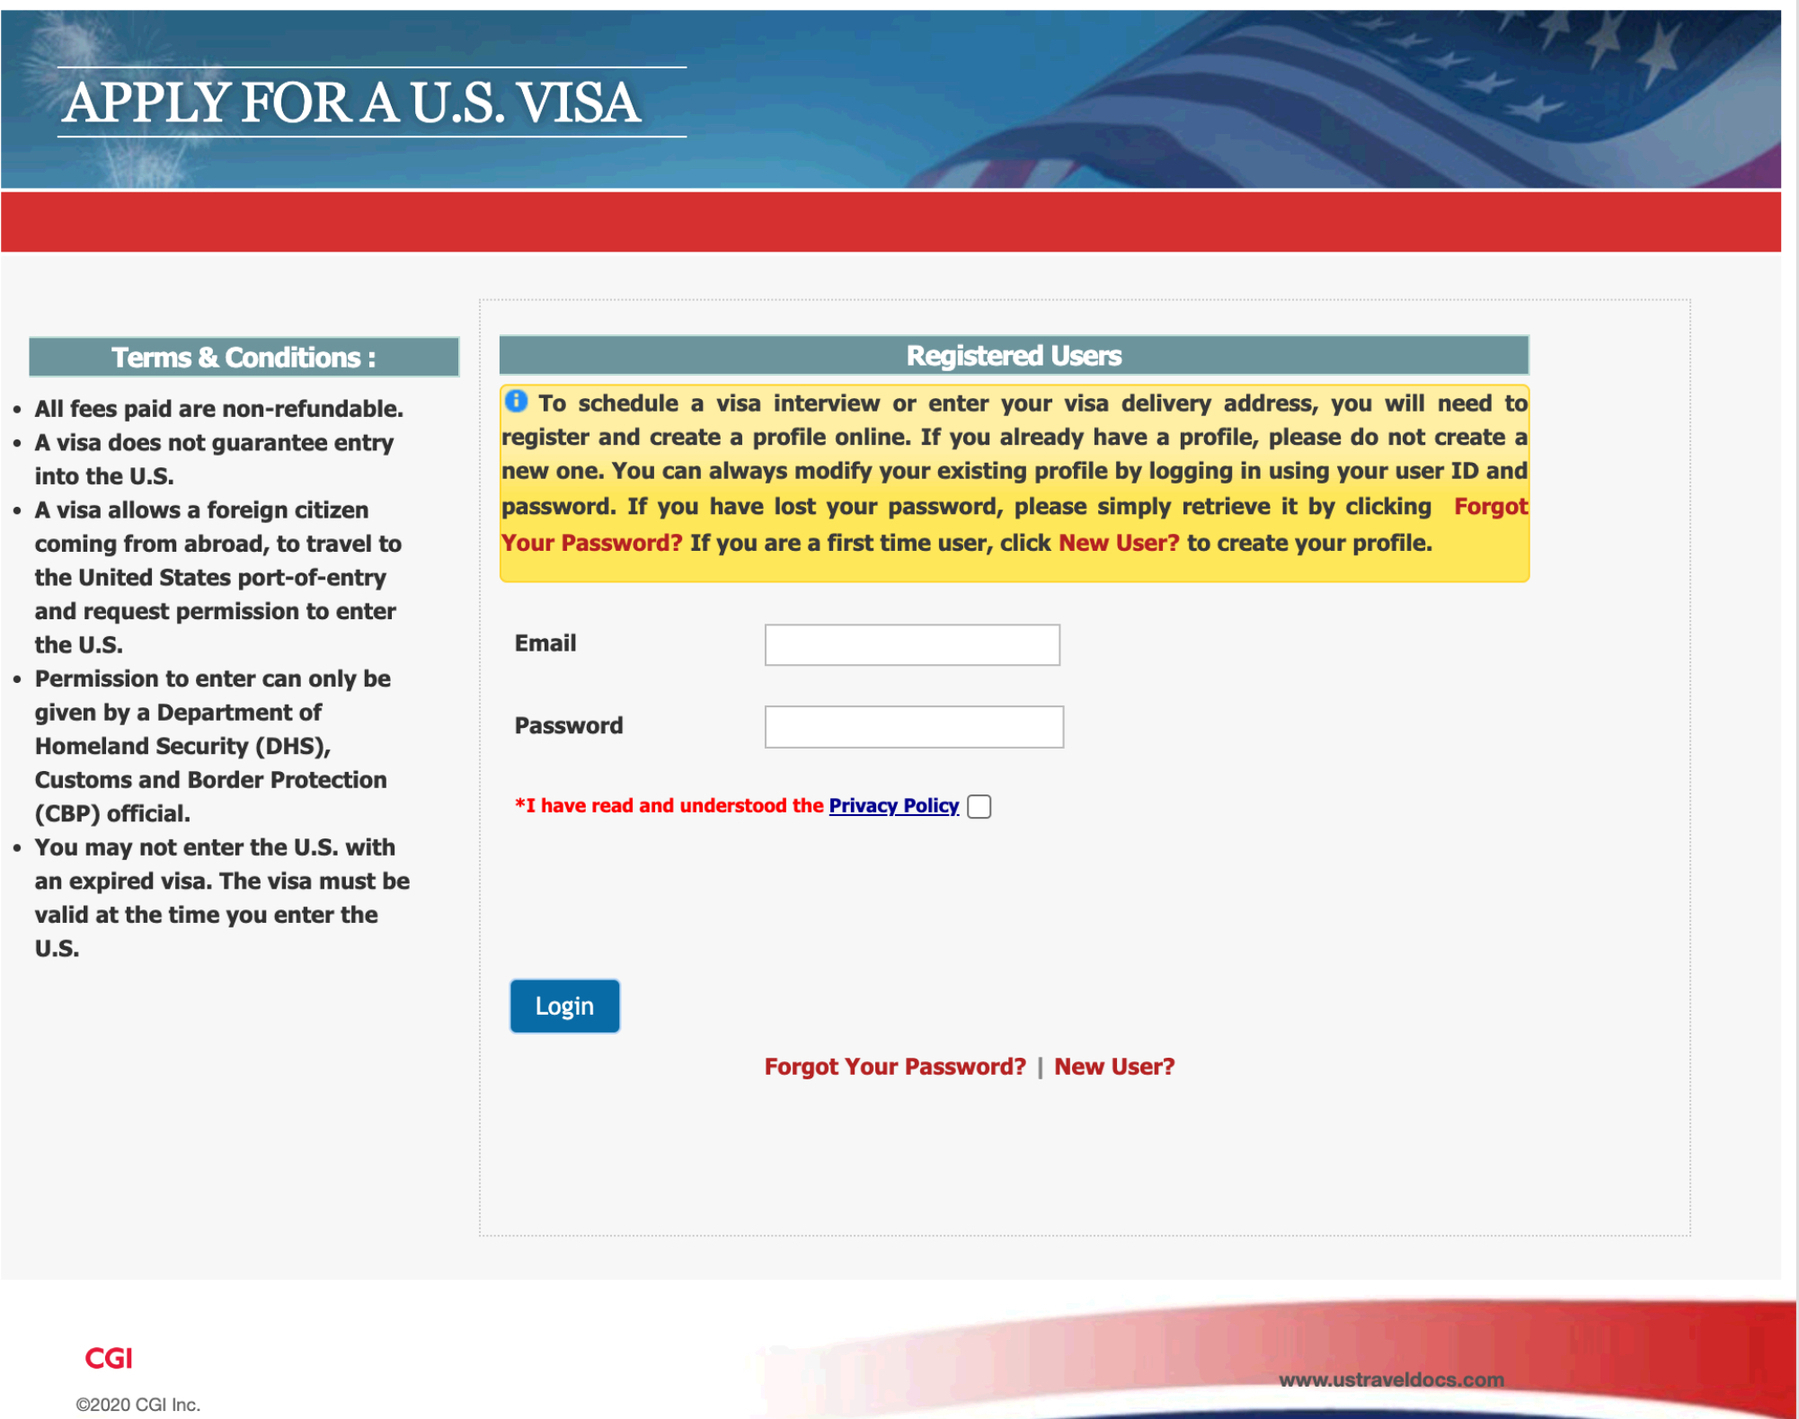
US Travel Docs is a third party that helps process US Visa applications in Singapore and several other countries.
A third-party provider, US Travel Docs, allows you to make your payment. The exact visa fees are converted according to a live consular exchange rate. When I paid, the visa fee was SGD 259.
They offer two modes of payment: online bank transfer, or physically with NETS/Cash at the VFS Global location along Anson Road. I chose to do the bank transfer.
They will provide you a receipt number, which will be the Bill Reference Number that you will use when paying “VFS Global” as a billing organisation. Once the payment is made, you can schedule an appointment (or in my case, retrieve the Visa Interview Waiver Letter) after 3pm of the next business day.
Step 3: Receive the Interview Waiver Letter
The Interview Waiver Program (IWP) waives the need for a physical interview at the Embassy for lower risk visitors, such as those that already have a visa and are just renewing.
You can qualify for a Visa Interview Waiver if you meet the following requirements1:
- have a previous visa of the same type,
- visa is still valid or expired in the past 48 months (2 years),
- you are a Singapore citizen, permanent resident, or long-term pass holder (includes all work passes)
- you hold the actual expired or valid previous visa, and it was not lost or stolen
- your most recent visa was issued after your 14th birthday. 2
All of the above applied to me.
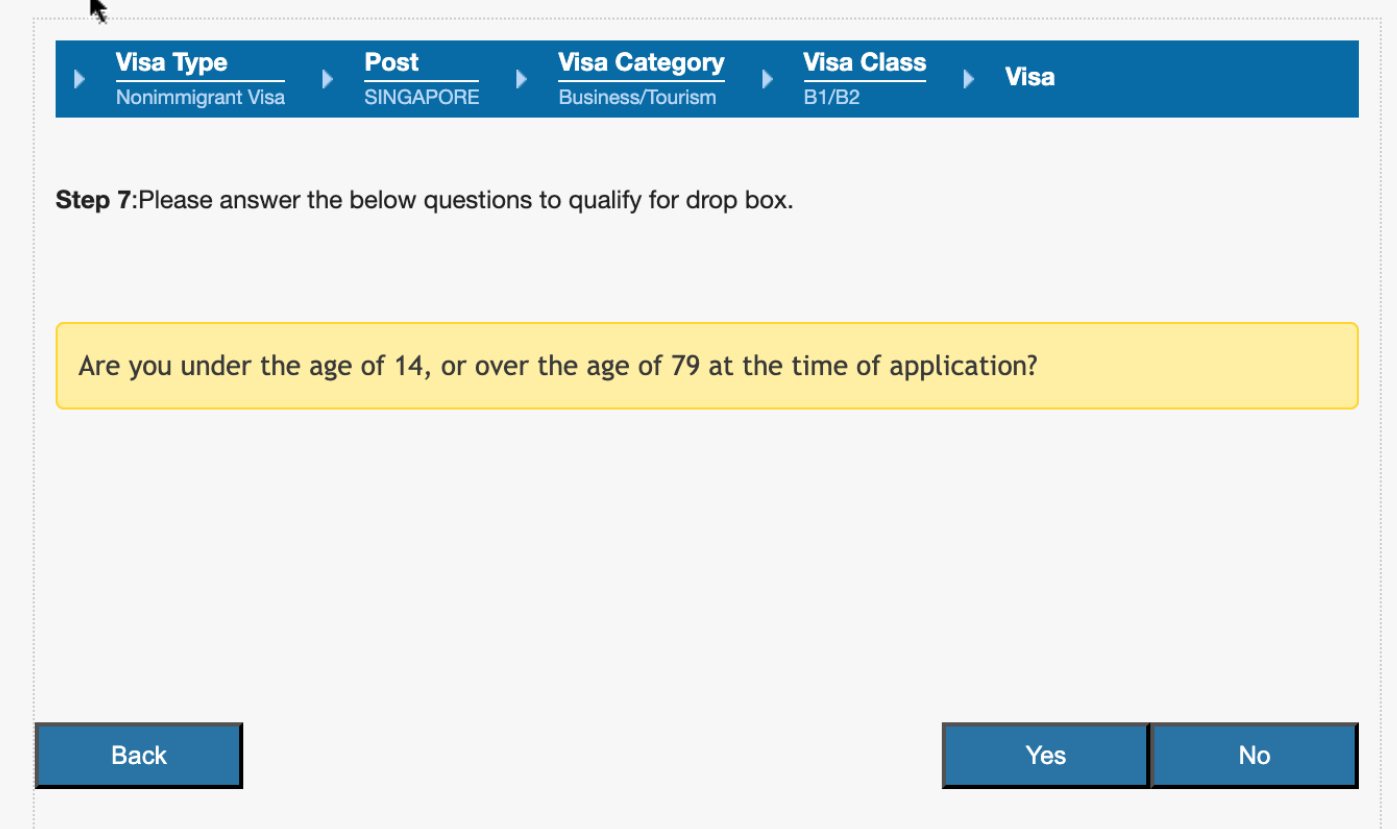
The appointment scheduling system on USTravelDocs will ask you a few questions to determine whether you are potentially eligible for a Visa Interview Waiver.
Once your payment is registered, you should be able to get an interview waiver letter from US Travel Docs. The site will ask you a few questions, and if you qualify for an Interview Waiver, you will be issued with an “Interview Waiver Letter”, pictured below:
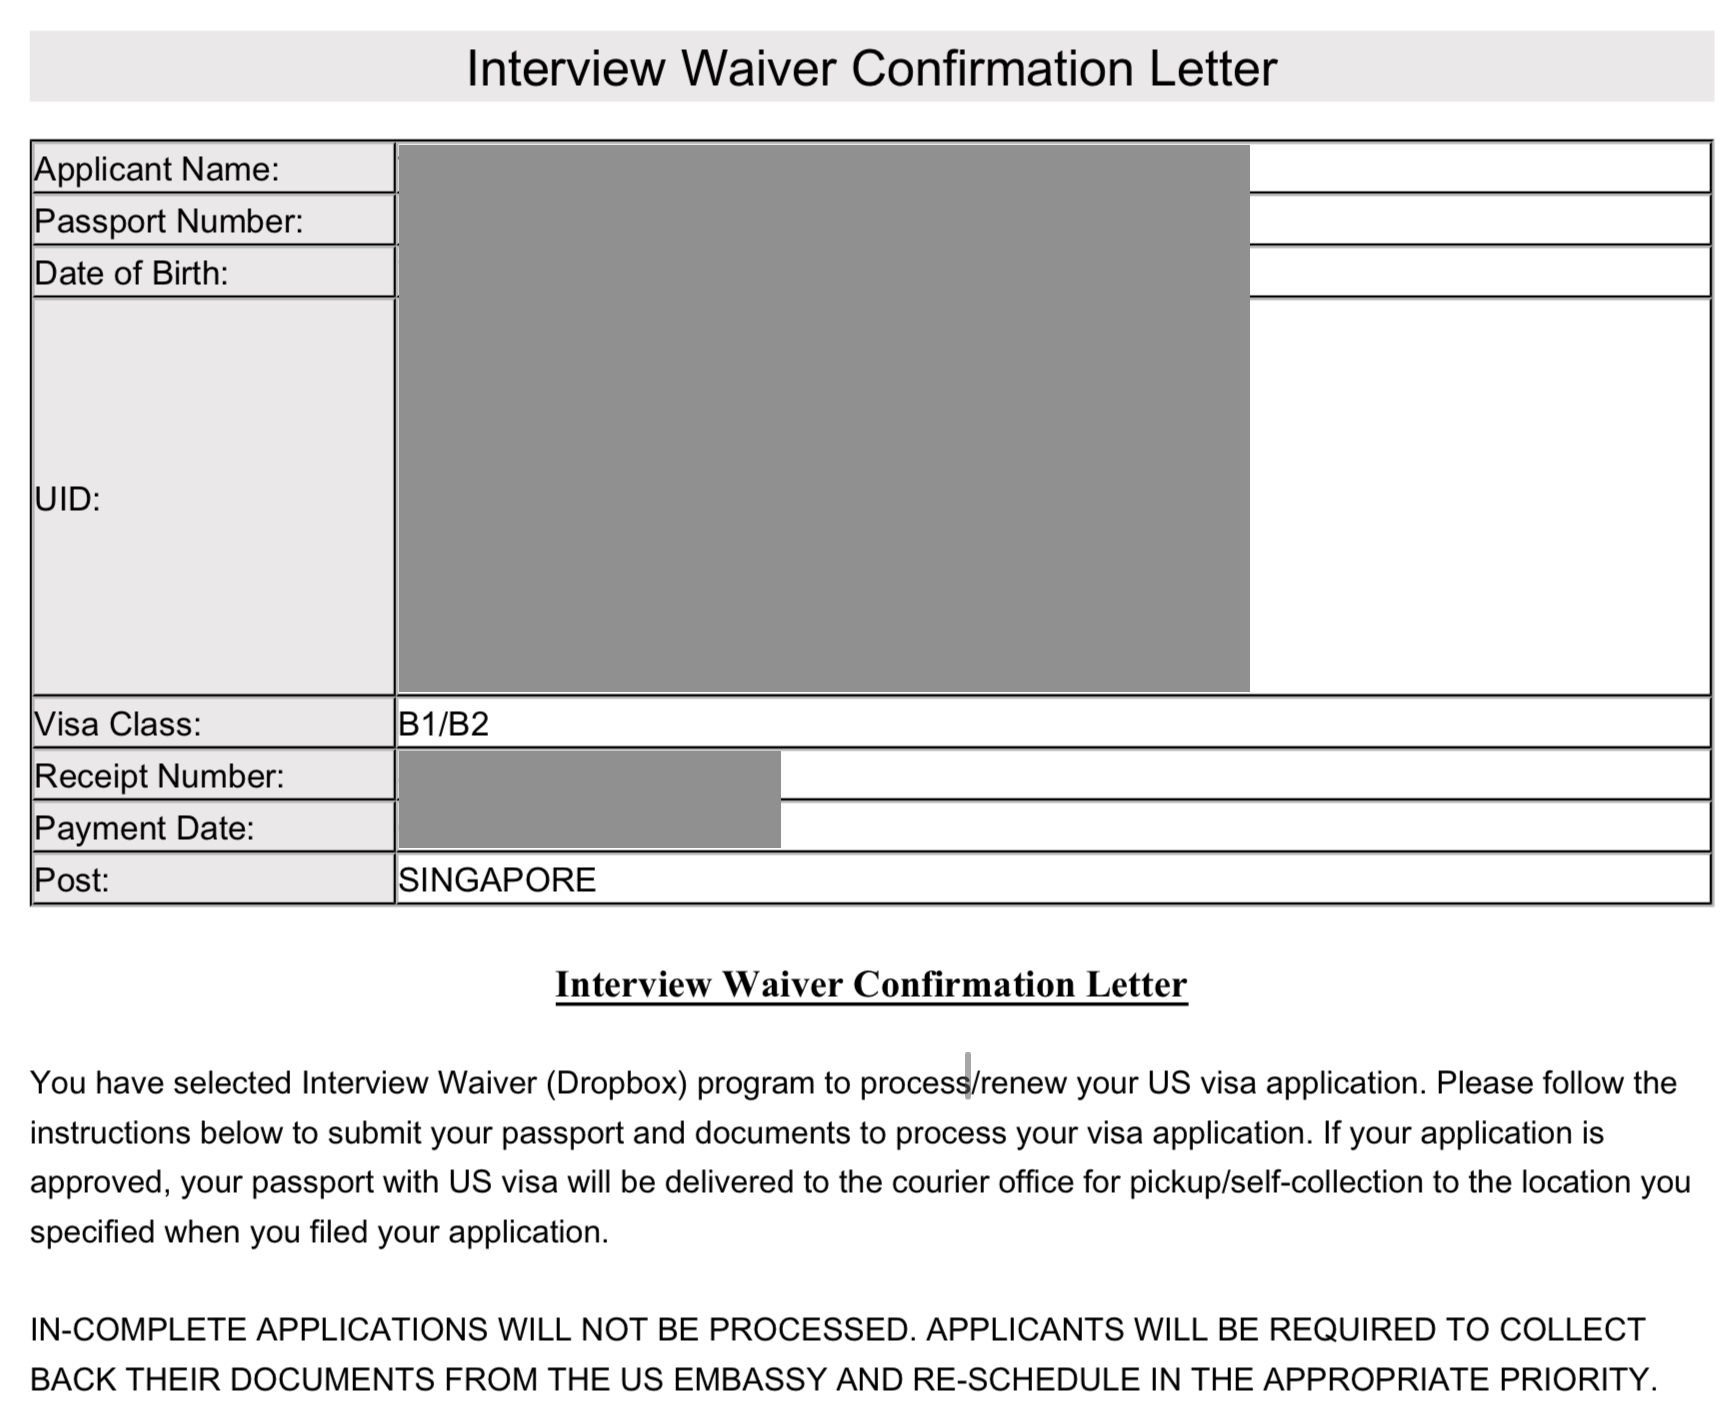
The Interview Waiver Letter is to be included in the documents you drop off to be processed by the embassy.
Step 4: Drop off your documents
You’ll need to gather the documents according to what was stated in the letter. For me, it required me to submit:
- DS-160 confirmation page printout,
- my original passport,
- the original passport containing my recently expired US Visa.
- the Interview Waiver Letter,
- a photocopy of my employment pass, and
- photo taken within the last 6 months (this is the photo that I was referring to in Step 1).
There are two dropoff locations: (a) People’s Park Centre, at a travel agency called BStone Travel Pte Ltd., and (b) a location in Changi that I didn’t consider because it was further away and charged a fee. I opted to use the People’s Park Centre location as it was a lot more convenient for me.
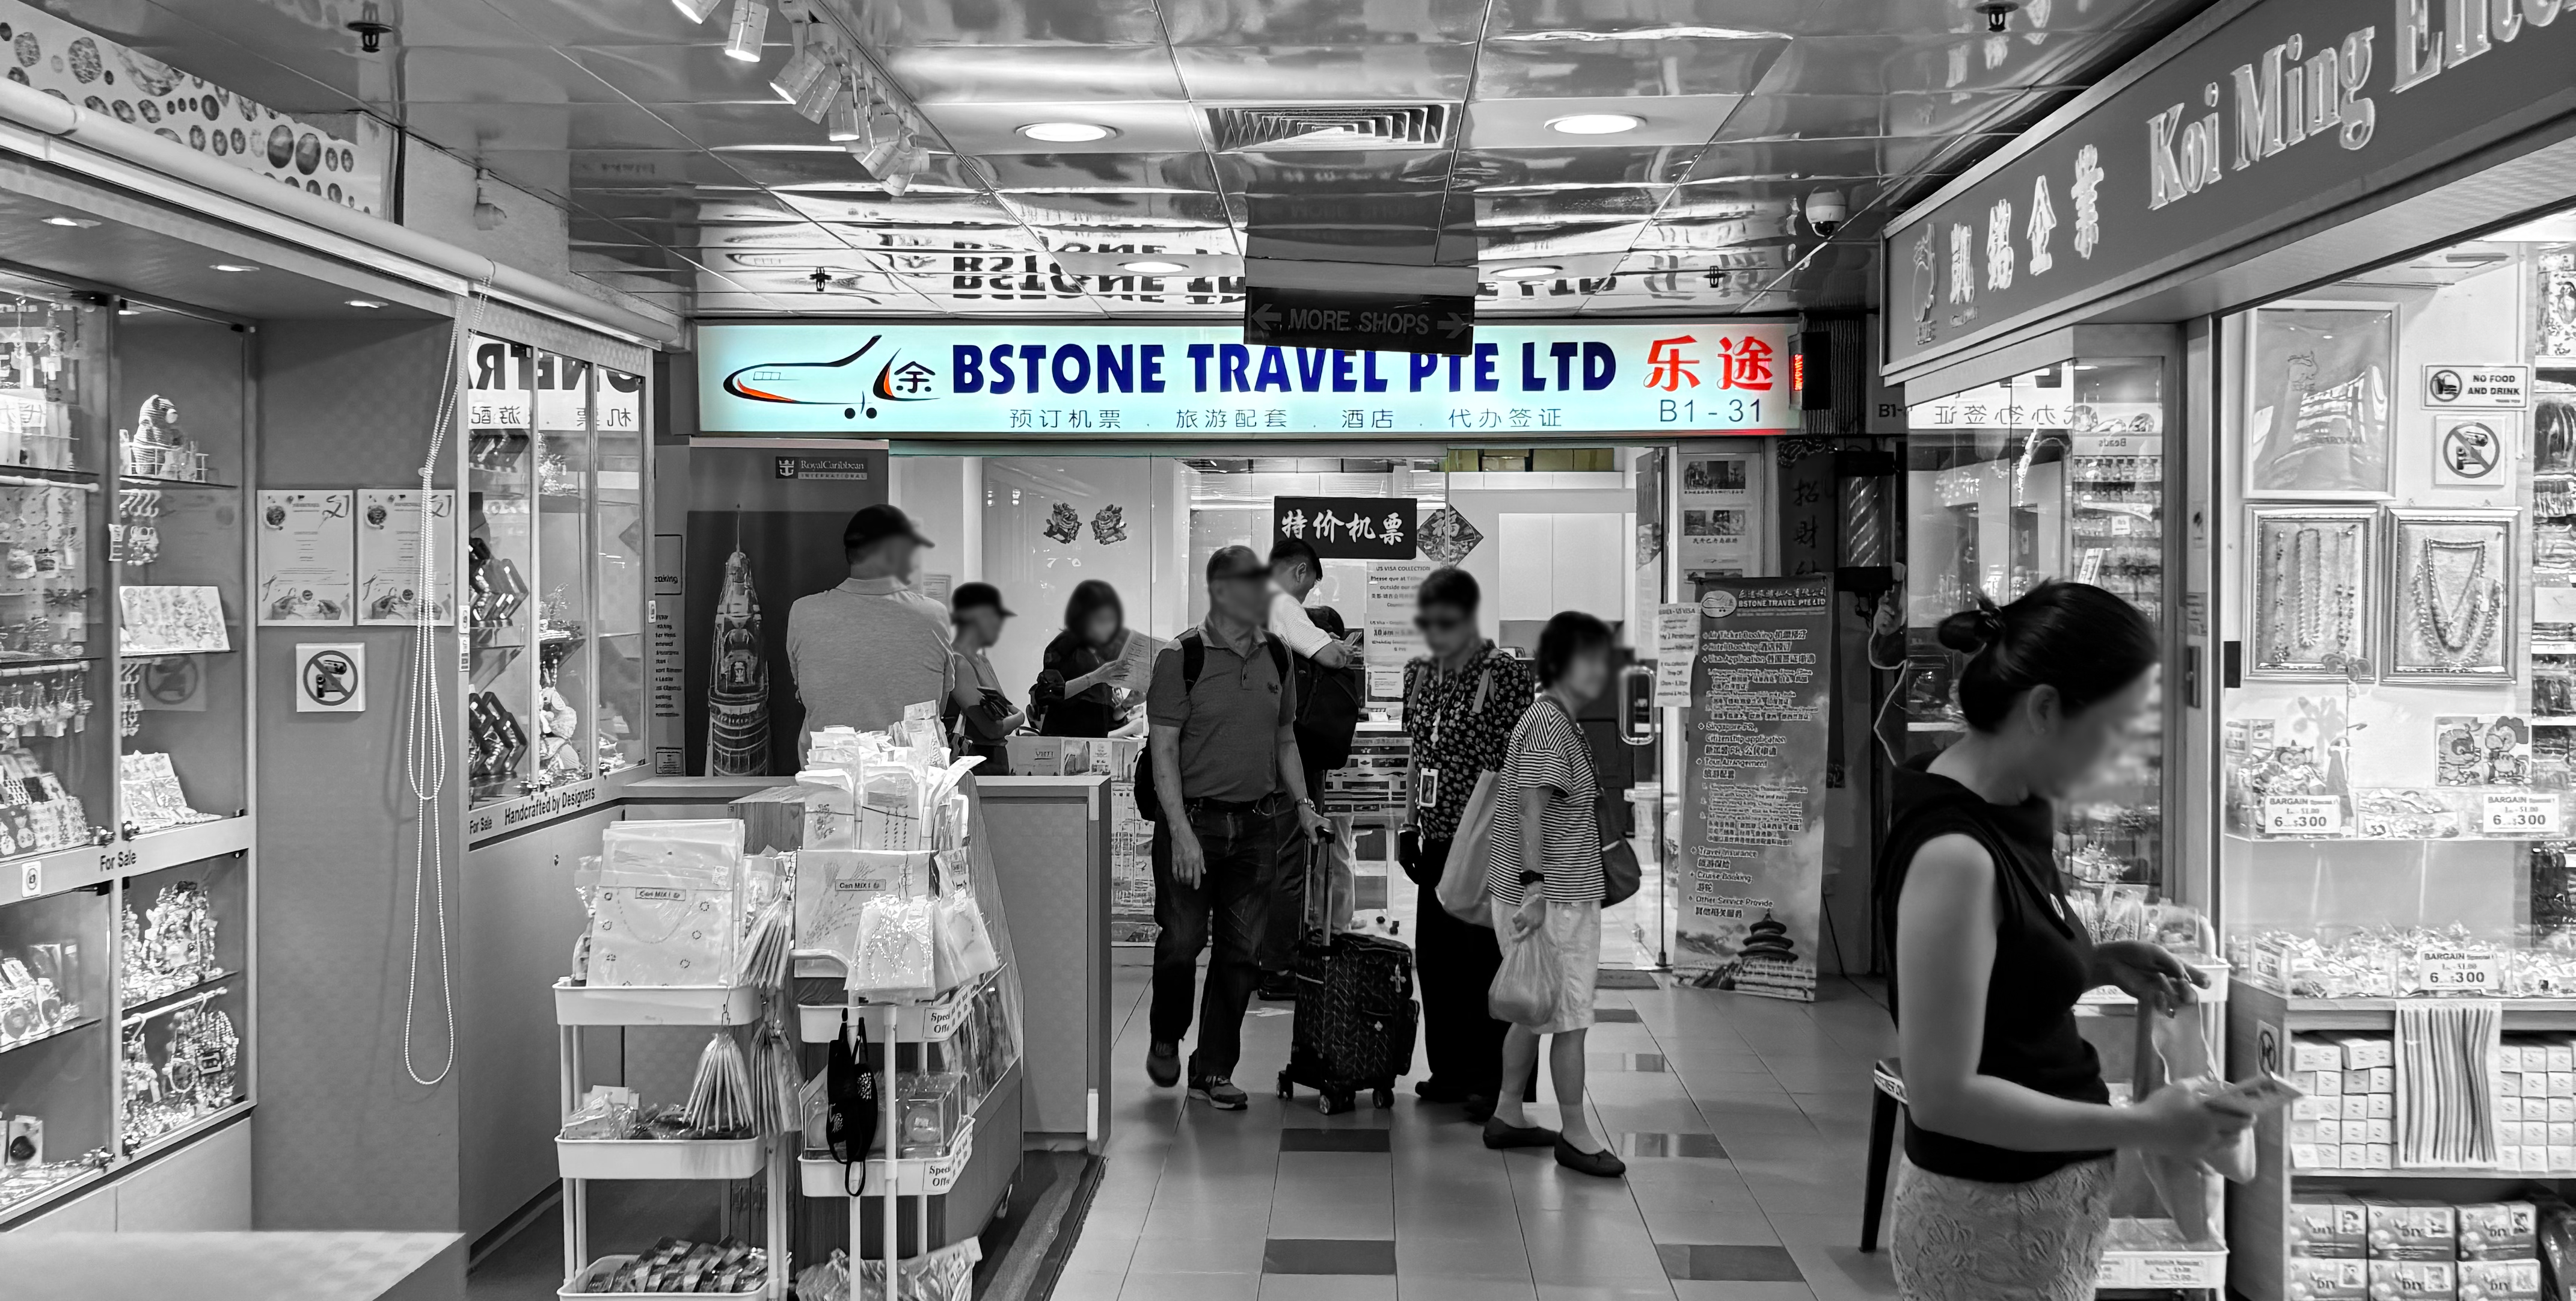
The shop is on the first basement near the Southwest corner of the mall.
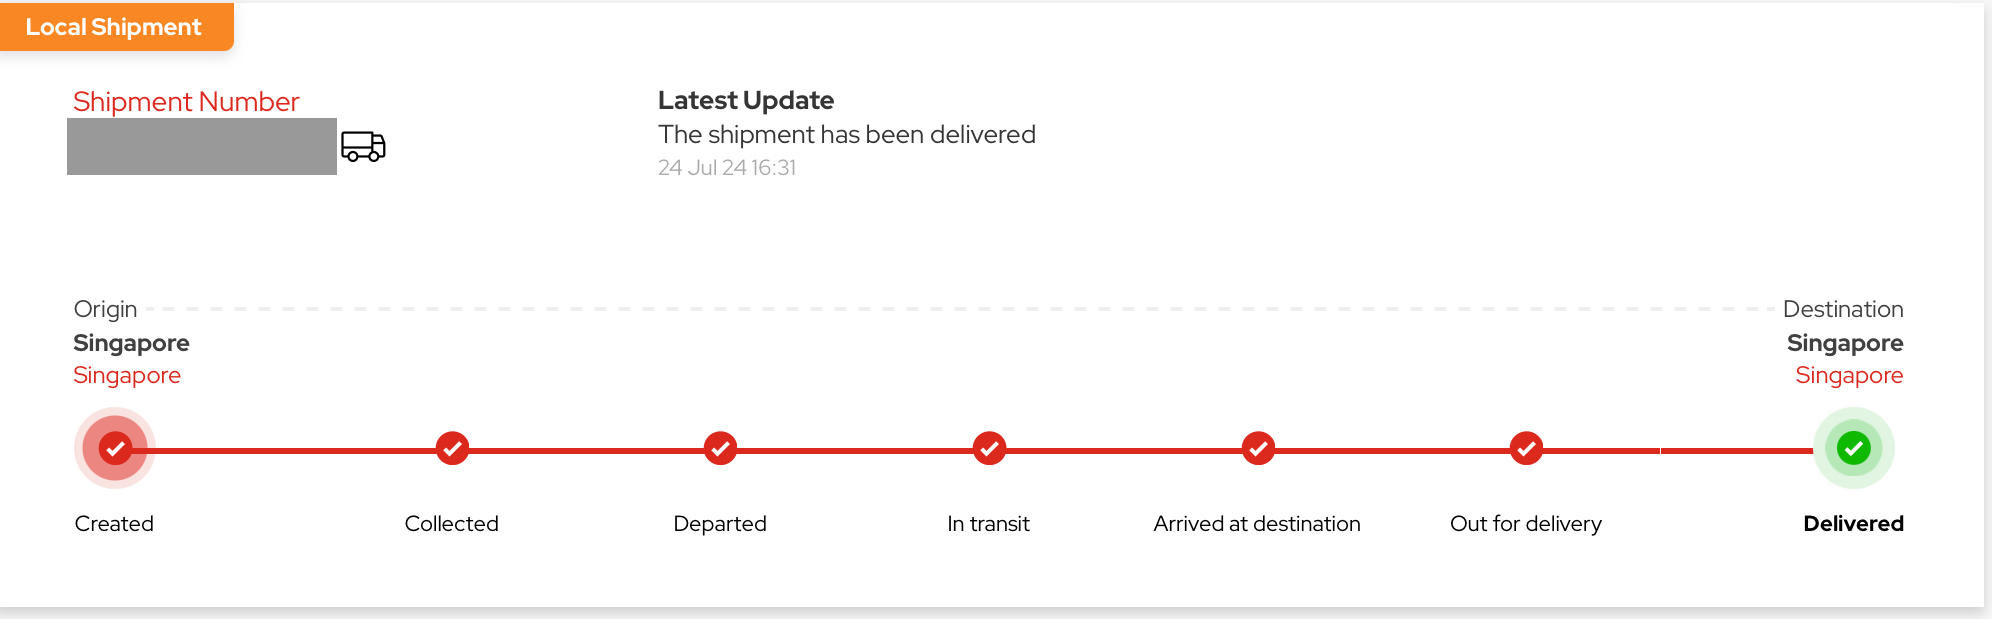
Dropping it off was straightforward. They provided me with an Aramex waybill when I dropped off my documents.
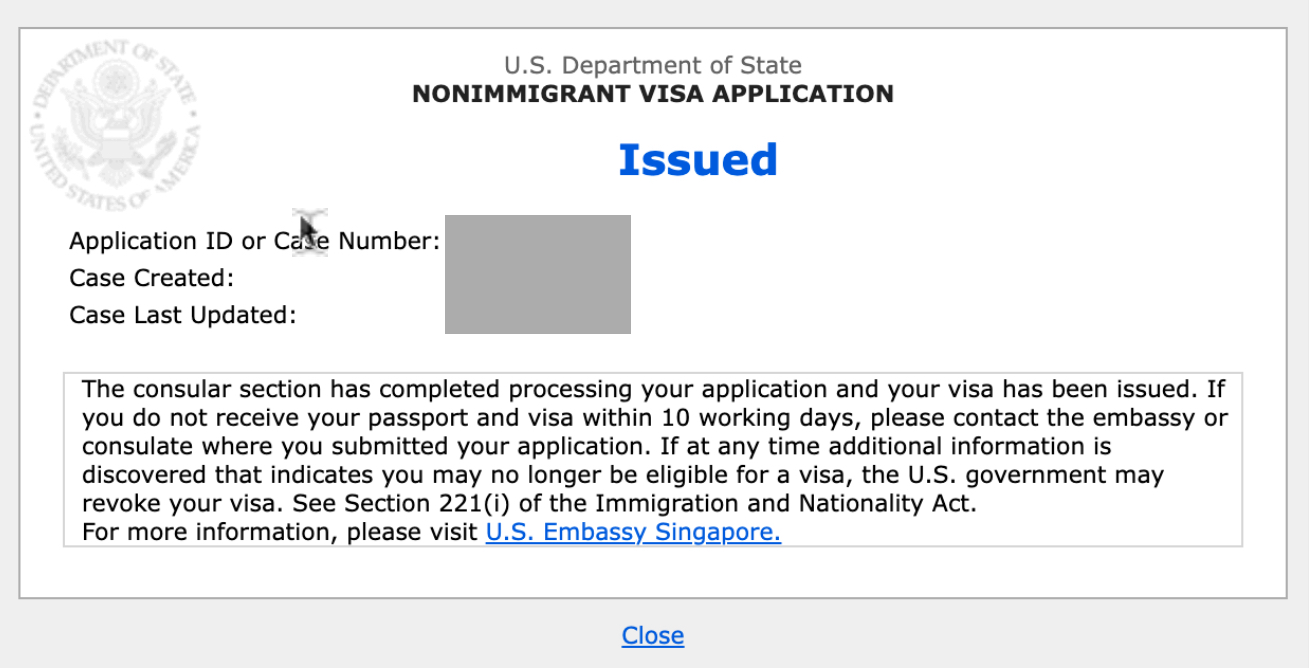
Step 5: Await approval and pick up the issued visa
After this point, you’ll just have to wait and monitor the progress of your visa. This was the timeline of my submission:
- T+0 (Tue): dropped off the documents at BStone
- T+1 (Wed): Aramex tracker moved from picked up to delivered
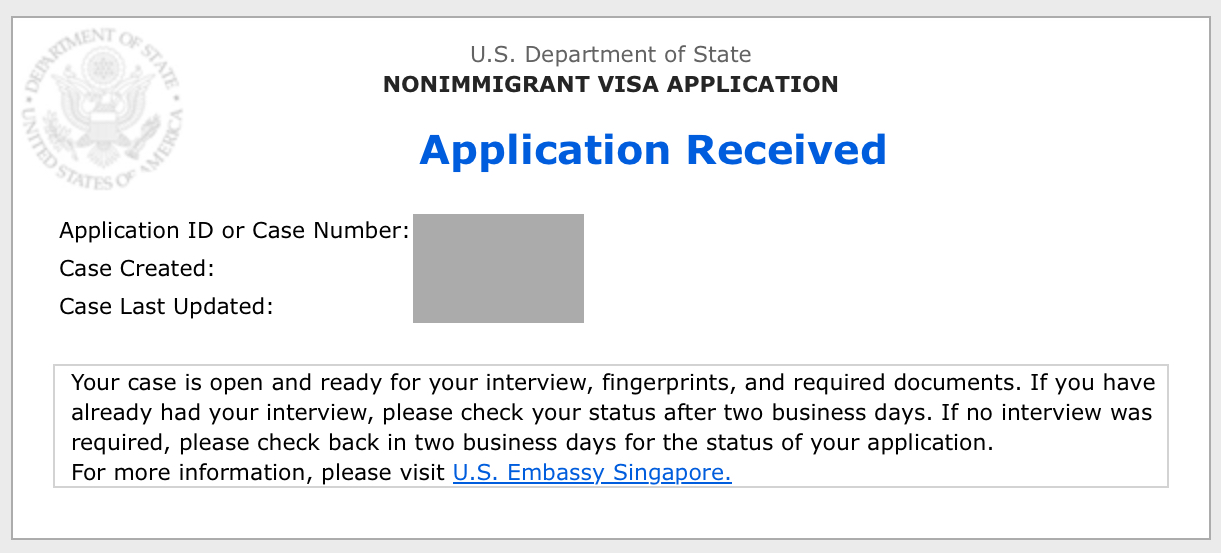
- T+2 (Thu) US visa tracker shows Application Received
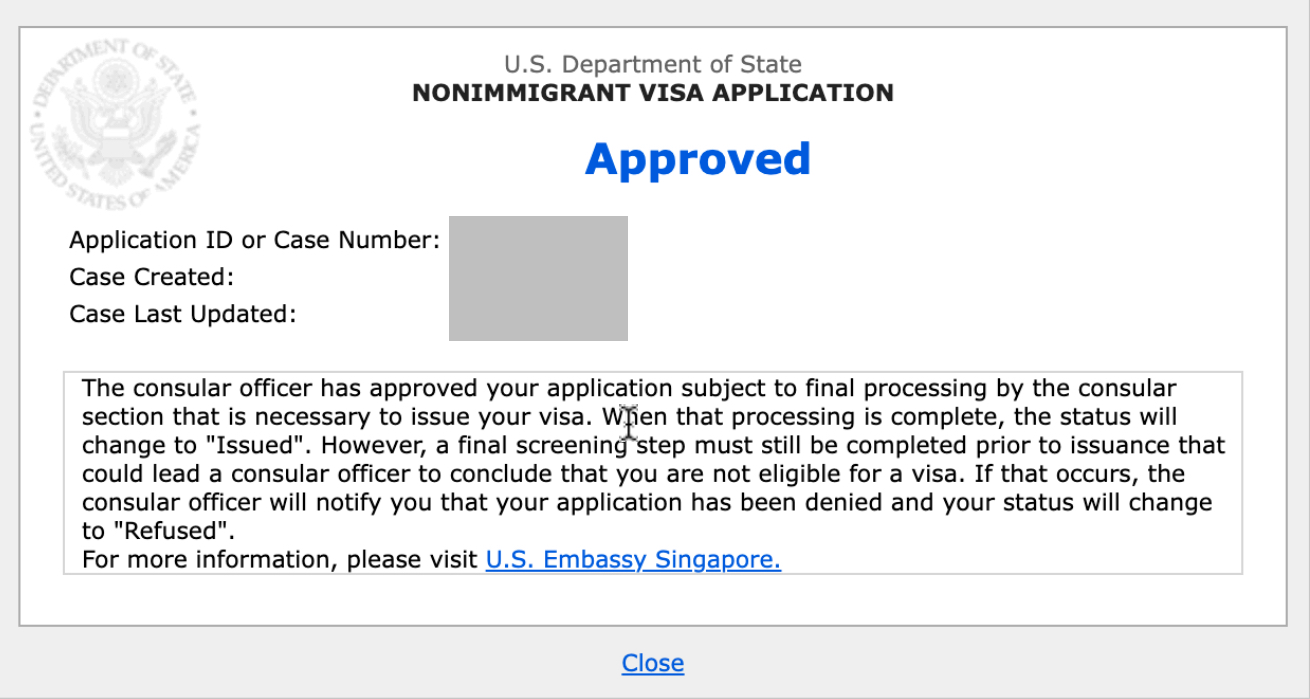
- T+3 (Fri): US visa tracker shows Approved
- T+6 (Mon): US visa tracker shows Issued
- T+7 (Tue): Received SMS and e-mail notifications from Aramex to pick up my passport and visa at the pickup location. I picked it up on this day as well from BStone.
US visa is secured! I’ll be able to travel to the US for short trips (and incidentally also use it to get a travel authorisation to Canada).
I hope this guide helps you out, and you are welcome to reach out for any clarifications! You can also check out this blog post from Pophagandi for their experience getting an Immigrant (H1-B1) visa.
-
I think this is because they would “ten-print” you, or collect all ten of your fingerprints, after this time. ↩︎